Creating a 3D print scalemail shark is more than just a fun project; it’s an exciting journey into the world of 3D printing, creativity, and design. Whether you're a beginner or an experienced maker, this guide will walk you through the entire process step-by-step, ensuring you have all the tools and knowledge you need to bring your vision to life. So, buckle up and get ready to dive into the deep waters of 3D printing!
This isn’t just about printing a shark—it’s about crafting something that blends art, engineering, and imagination. Scalemail sharks are unique because they mimic the texture and appearance of real shark scales, making them perfect for cosplay, props, or even educational models. If you're looking to impress your friends or expand your 3D printing skills, this is the project for you.
Now, let’s break it down. In this article, we’ll cover everything from designing your shark model to selecting the right materials and finishing touches. By the end, you’ll not only know how to make a 3D print scalemail shark but also understand the nuances of creating intricate designs with 3D printing. Let’s get started!
Read also:Max Plant Farm The Ultimate Guide To Revolutionizing Your Green Thumb
Here’s a quick overview of what we’ll cover:
- Introduction to 3D Printing and Scalemail Design
- Choosing the Right Software for Your Shark Model
- Designing the Perfect Shark Shape
- Selecting Materials That Matter
- Printing Tips and Tricks
- Post-Processing Techniques
- Common Mistakes to Avoid
- Advanced Customizations
- Cost Breakdown and Budgeting
- Final Touches and Showcasing Your Creation
Introduction to 3D Printing and Scalemail Design
Before we dive into the specifics of how to make a 3D print scalemail shark, let’s take a moment to understand the basics of 3D printing and why scalemail designs are so popular. Scalemail, in its simplest form, refers to any design that incorporates small, overlapping scales to create a textured surface. This technique is often used in armor design, but it can also be applied to animals like sharks to replicate their natural scale patterns.
3D printing has revolutionized the way we create objects, allowing us to bring complex designs to life with ease. With the right tools and software, you can design and print anything from simple models to intricate sculptures. For a scalemail shark, the key is in the details—getting those scales just right will make all the difference.
So, why choose a shark? Sharks are fascinating creatures with unique scale structures that add an extra layer of complexity to your project. Whether you’re aiming for realism or a more stylized look, there’s something about a shark that captures the imagination. Plus, it’s a great way to show off your skills!
Choosing the Right Software for Your Shark Model
Selecting the right software is crucial when it comes to designing a 3D print scalemail shark. There are plenty of options out there, but not all of them are created equal. Here’s a quick rundown of some of the best software for beginners and advanced users alike:
Software Options for Beginners
If you’re new to 3D printing, you’ll want to start with user-friendly software that doesn’t require a steep learning curve. Some great options include:
Read also:American Legion Thurmont Maryland A Hub Of Community And Tradition
- TinkerCAD: Perfect for beginners, TinkerCAD offers a simple interface and a wide range of pre-made shapes to help you get started.
- Fusion 360: While it’s more advanced than TinkerCAD, Fusion 360 is still accessible to beginners and offers a free version for hobbyists.
- Blender: Blender is a powerful tool that’s free to use, but it does require some time to learn. If you’re serious about 3D design, it’s worth the effort.
Software for Advanced Users
For those who already have some experience with 3D printing, you might want to explore more advanced software options:
- Maya: Maya is a professional-grade software used in the film and gaming industries. It’s ideal for creating highly detailed models.
- ZBrush: ZBrush is another professional tool that excels in sculpting and texturing. It’s perfect for adding those intricate scale details to your shark.
Remember, the software you choose will depend on your skill level and the complexity of your design. Don’t be afraid to experiment and find what works best for you!
Designing the Perfect Shark Shape
Once you’ve chosen your software, it’s time to start designing your shark. This is where the magic happens! To create a realistic scalemail shark, you’ll need to focus on two main aspects: the overall shape of the shark and the scale pattern.
Step 1: Sketching Your Shark
Before you dive into the software, it’s a good idea to sketch out your shark design on paper. This will give you a clear idea of what you want to achieve and help you plan your design process. Consider the following:
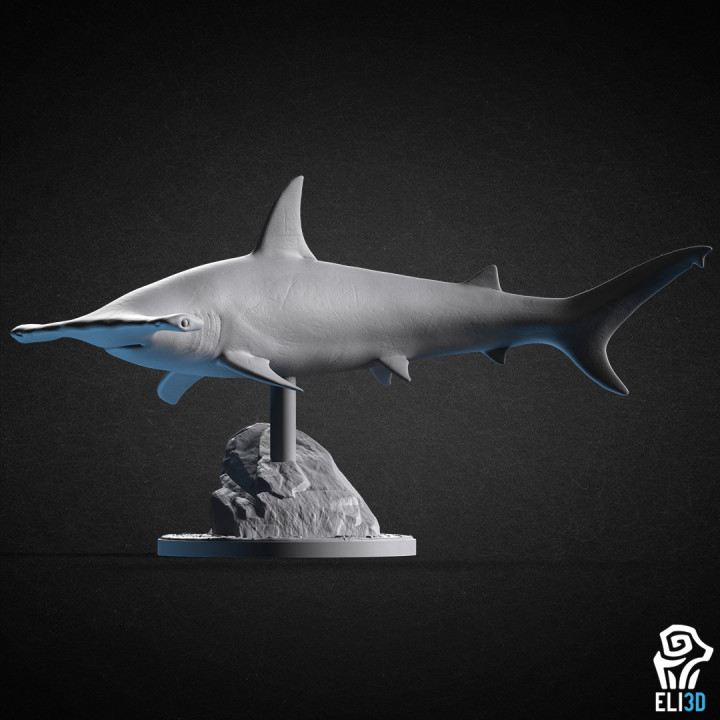
- What type of shark are you modeling? Great white, hammerhead, or something entirely unique?
- What features do you want to highlight? Teeth, fins, or tail?
- How detailed do you want the scales to be?
Step 2: Creating the Base Model
Once you have your sketch, it’s time to create the base model in your chosen software. Start with a basic shape and gradually add details like fins, gills, and eyes. Keep in mind that the more detailed your model, the longer it will take to print.
Step 3: Adding the Scale Pattern
This is the most exciting part of the process! To create a realistic scalemail effect, you’ll need to add small, overlapping scales to your shark’s body. You can do this manually or use a plugin or script to automate the process. Either way, take your time to ensure the scales look natural and uniform.
Selecting Materials That Matter
Choosing the right material is just as important as designing your shark. The material you select will affect the final appearance, durability, and cost of your print. Here are some popular options:
- PLA: PLA is a popular choice for beginners because it’s easy to print with and comes in a variety of colors. However, it’s not the most durable material.
- PETG: PETG is a bit more durable than PLA and has a glossy finish, making it a great choice for detailed models.
- ABS: ABS is strong and flexible, but it can be tricky to print with. It’s best suited for experienced users.
- Resin: If you want the highest level of detail, resin printing is the way to go. Just be prepared for a longer print time and more post-processing.
Consider the purpose of your shark when choosing a material. Are you creating a display piece, a cosplay prop, or an educational model? Each use case will have different requirements.
Printing Tips and Tricks
Now that you have your design and material ready, it’s time to print! Here are some tips to ensure a successful print:
- Calibrate Your Printer: Make sure your printer is properly calibrated before starting your print. This will help prevent issues like warping or layer shifting.
- Use Supports Wisely: Supports are essential for overhanging parts of your model, but too many can make cleanup difficult. Use them sparingly and strategically.
- Print in Layers: Print your shark in smaller sections if it’s too large for your printer’s build plate. You can assemble the pieces later.
Don’t get discouraged if your first print doesn’t turn out perfectly. 3D printing is all about trial and error, and each failed print is a learning opportunity.
Post-Processing Techniques
Once your shark is printed, it’s time to bring it to life with post-processing. This is where you can really make your model stand out:
- Sanding: Sanding smooths out any rough edges and gives your shark a polished look.
- Painting: Painting adds color and detail to your model. Consider using acrylics for a vibrant finish.
- Varnishing: A coat of varnish protects your shark and enhances its appearance.
Take your time with post-processing—it’s what separates a good print from a great one!
Common Mistakes to Avoid
Even the most experienced makers make mistakes from time to time. Here are some common pitfalls to watch out for:
- Ignoring Supports: Forgetting to add supports can lead to broken or misshapen parts.
- Using the Wrong Material: Choosing a material that’s not suited for your design can result in a weak or fragile print.
- Rushing the Process: Rushing through any part of the process can lead to mistakes. Take your time and enjoy the journey!
Remember, mistakes are part of the learning process. Learn from them and keep improving!
Advanced Customizations
Once you’ve mastered the basics, you can start exploring advanced customizations to take your shark to the next level:
- Adding LED Lights: Incorporating LED lights into your shark’s eyes or fins can create a stunning effect.
- Texturing: Experiment with different textures to give your shark a more realistic look.
- Modular Design: Designing your shark in modular sections allows for easy assembly and disassembly.
Let your creativity run wild and see where it takes you!
Cost Breakdown and Budgeting
3D printing can be a bit expensive, especially if you’re using high-quality materials. Here’s a rough cost breakdown to help you budget:
- Printer: Depending on the model, a good 3D printer can cost anywhere from $200 to $2,000.
- Materials: PLA filament costs around $20 per kilogram, while resin can cost upwards of $50 per liter.
- Post-Processing Supplies: Sandpaper, paint, and varnish can add up, so factor these into your budget.
Set a budget before you start your project and stick to it. There’s no need to break the bank to create a beautiful shark!
Final Touches and Showcasing Your Creation
Once your shark is complete, it’s time to show it off! Here are some ideas for showcasing your creation:
- Display Case: A display case will protect your shark and make it a focal point in any room.
- Social Media: Share your creation on social media to inspire others and get feedback.
- Local Events: Attend local maker fairs or conventions to show off your skills and connect with other enthusiasts.
Creating a 3D print scalemail shark is a rewarding experience that combines art, science, and technology. With the right tools, techniques, and mindset, you can bring your vision to life and create something truly remarkable.
Kesimpulan
In this comprehensive guide, we’ve covered everything you need to know about how to make a 3D print scalemail shark. From choosing the right software and materials to designing and printing your shark, each step is crucial to achieving success. Remember, 3D printing is all about experimentation and learning, so don’t be afraid to try new things and push the boundaries of your creativity.
Now that you’ve learned the basics, it’s time to take action! Start designing your shark, select your materials, and begin the printing process. And don’t forget to share your progress with the world. Who knows? Your creation might just inspire others to embark on their own 3D printing journey.
So, what are you waiting for? Grab your tools, fire up your printer, and let’s make some waves in the world of 3D printing!