So, you're looking to dive into the world of SSH remote IoT on a Mac without breaking the bank? Well, you're in the right place, my friend. If you've ever wondered how to use SSH remote IoT on Mac for free, this is the ultimate guide for you. We'll break it down step by step, so even if you're a total noob, you'll feel like a pro by the end. Trust me, SSH isn't as scary as it sounds, and setting up remote IoT access is easier than you think.
SSH, or Secure Shell, is basically a way to connect to another computer or device securely over a network. Think of it as a secret tunnel that lets you control remote devices from your Mac. And when we're talking about IoT (Internet of Things), we're talking about all those smart devices that make life easier. The good news? You can do all this for free, and we'll show you exactly how.
Before we dive in, let me tell you something cool. You don't need any fancy software or paid subscriptions to get started. Your Mac already has everything you need to connect to remote IoT devices using SSH. All you need is a little guidance, and that's where we come in. So grab a coffee, get comfy, and let's get started!
Read also:Greg Gutfeld Baby Adopted The Untold Story Behind The Headlines
Why Use SSH for Remote IoT Access?
First things first, why would you even want to use SSH for remote IoT access? Well, there are a ton of reasons, but here are the top ones:
- It's secure – SSH encrypts all your data, so no one can snoop on what you're doing.
- It's free – You don't need to pay for expensive software or services.
- It's reliable – SSH has been around for ages, and it works like a charm.
- It's versatile – You can use SSH to control all kinds of devices, from Raspberry Pi to smart home gadgets.
Plus, if you're into IoT, SSH is kind of a must-have skill. It's like learning how to ride a bike – once you know how to do it, you'll wonder how you ever lived without it.
What You Need to Get Started
Before you start messing around with SSH, you'll need a few things:
- A Mac – Obviously, since we're talking about how to use SSH remote IoT on Mac for free.
- A remote IoT device – This could be a Raspberry Pi, an Arduino, or any other smart device.
- An active internet connection – Both your Mac and your IoT device need to be online.
- The IP address of your IoT device – Don't worry, we'll show you how to find this later.
And that's it! No fancy tools or expensive hardware required. Your Mac is already equipped with everything you need to get started with SSH.
Step-by-Step Guide: How to Use SSH Remote IoT on Mac for Free
Alright, let's get down to business. Here's a step-by-step guide to help you set up SSH remote IoT on your Mac:
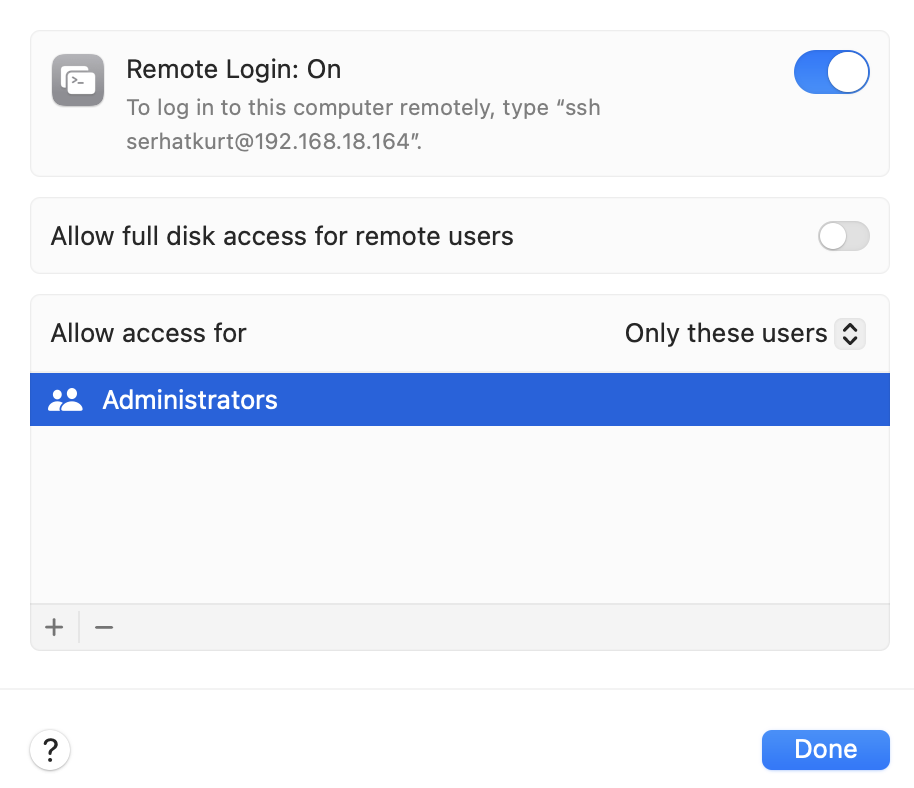
Step 1: Enable SSH on Your IoT Device
The first thing you need to do is enable SSH on your IoT device. If you're using a Raspberry Pi, you can do this by:
Read also:Amazon Project Kuiper Satellite Launch The Race To Revolutionize Internet Connectivity
- Opening the Raspberry Pi Configuration tool.
- Going to the "Interfaces" tab.
- Selecting "SSH" and clicking "Enable."
For other devices, the process might be a bit different, but the concept is the same – you just need to turn SSH on.
Step 2: Find the IP Address of Your IoT Device
Next, you need to find the IP address of your IoT device. You can usually do this by:
- Opening the terminal on your IoT device.
- Typing
ifconfigorip addrand hitting Enter. - Looking for the IP address under the "inet" section.
Once you've got the IP address, jot it down – you'll need it in the next step.
Step 3: Open Terminal on Your Mac
Now it's time to switch over to your Mac. Here's how you open Terminal:
- Click on the Spotlight icon in the top-right corner of your screen.
- Type "Terminal" and hit Enter.
Boom! You're now in the Terminal, where all the magic happens.
Step 4: Connect to Your IoT Device
With Terminal open, it's time to connect to your IoT device. Type the following command, replacing "username" and "IP_address" with the actual username and IP address of your IoT device:
ssh username@IP_address
Hit Enter, and you should be prompted to enter a password. Once you do that, you'll be connected to your IoT device via SSH.
Tips and Tricks for Using SSH Remote IoT on Mac
Now that you know how to use SSH remote IoT on Mac for free, here are a few tips and tricks to make your life easier:
- Use SSH keys instead of passwords – This makes logging in faster and more secure.
- Set up port forwarding – This lets you access your IoT device from anywhere in the world.
- Use a static IP address – This ensures that your IoT device always has the same IP address, so you don't have to keep changing it.
And if you're feeling really adventurous, you can even set up a reverse SSH tunnel to access your IoT device even when it's behind a firewall. But that's a topic for another day.
Common Issues and How to Fix Them
Of course, nothing ever goes perfectly the first time, right? Here are some common issues you might run into when using SSH remote IoT on Mac, and how to fix them:
Issue 1: Connection Refused
If you're getting a "connection refused" error, it probably means that SSH isn't enabled on your IoT device. Double-check that you've enabled SSH and try again.
Issue 2: Permission Denied
If you're getting a "permission denied" error, it might be because you're using the wrong username or password. Double-check your credentials and try again.
Issue 3: Timeout Error
If you're getting a "timeout" error, it might be because your IoT device isn't connected to the internet. Make sure both your Mac and your IoT device are online and try again.
Security Best Practices for SSH Remote IoT
Now that you know how to use SSH remote IoT on Mac for free, it's important to keep your connection secure. Here are a few security best practices:
- Use strong passwords – Avoid using simple passwords like "password" or "123456."
- Enable two-factor authentication – This adds an extra layer of security to your SSH connection.
- Keep your software up to date – Make sure both your Mac and your IoT device are running the latest software.
By following these best practices, you can help protect your SSH connection from hackers and other bad actors.
Advanced Features of SSH for Remote IoT
Once you've mastered the basics of SSH remote IoT on Mac, you can start exploring some of the more advanced features. Here are a few to check out:
- SSH tunnels – These allow you to securely access other services running on your IoT device.
- SSH forwarding – This lets you forward traffic from one device to another securely.
- SSH keys – As we mentioned earlier, using SSH keys instead of passwords can make your connection faster and more secure.
And if you're feeling really adventurous, you can even set up a full-fledged SSH server on your IoT device. But that's a topic for another day.
Conclusion: Take Your IoT Skills to the Next Level
So there you have it – everything you need to know about how to use SSH remote IoT on Mac for free. By following the steps in this guide, you can connect to your IoT devices securely and easily from anywhere in the world. And with a little practice, you'll be able to do all kinds of cool things with SSH.
But don't stop here! There's always more to learn when it comes to IoT and SSH. So keep experimenting, keep learning, and most importantly, have fun. And if you found this guide helpful, be sure to share it with your friends and leave a comment below. Happy hacking!
Table of Contents
- Why Use SSH for Remote IoT Access?
- What You Need to Get Started
- Step-by-Step Guide: How to Use SSH Remote IoT on Mac for Free
- Tips and Tricks for Using SSH Remote IoT on Mac
- Common Issues and How to Fix Them
- Security Best Practices for SSH Remote IoT
- Advanced Features of SSH for Remote IoT
- Conclusion: Take Your IoT Skills to the Next Level